
Paso 5: Install Your New Shower Head
It's always a good idea to refer to the installation instructions for your new shower head. The basics are outlined below, but double check your instructions to make sure you've covered all the steps.

Fixed Shower Heads
- Check to make sure there's a gasket and debris screen inside the shower head. The gasket helps ensure a tight seal, and the debris screen helps prevent larger particles from getting inside the shower head and potentially damaging internal components.
- Hand-tighten the shower head onto the shower arm by turning the nut clockwise until the connection is snug. Be careful not to over-tighten. Avoid using tools (e.g., pliers or an adjustable wrench) that make it easy to twist too hard, potentially causing damage or leaks.
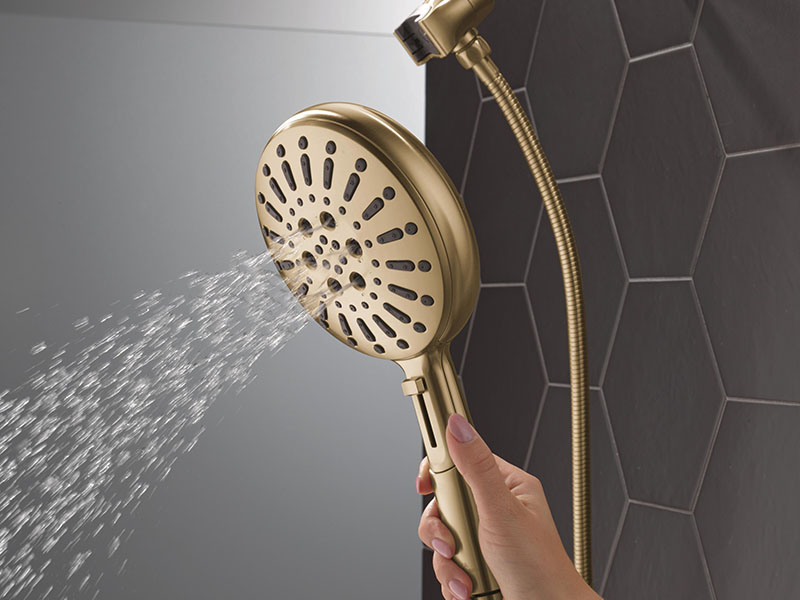
Duchas manuales
- Check to make sure there's a gasket and debris screen inside the hand shower mount. The gasket helps ensure a tight seal, and the debris screen helps prevent larger particles from getting inside the hand shower and potentially damaging internal components.
- Attach the hand shower mount to the shower arm and tighten by hand. Be careful not to over-tighten. Avoid using tools (e.g., pliers or an adjustable wrench) that make it easy to twist too hard, potentially causing damage or leaks.
- Verify there's a hose gasket in the hose nut on both ends of the shower hose.
- Connect the flexible shower hose to the mount and the hand-held shower. Hand-tighten the connections. Installation tip: Sometimes the hose will have two different types of connections. If one end has a hex nut (six sides), attach it to the shower arm mount. Attach the tapered conical nut to the hand-held shower.
- Place the hand-held shower head in the mount.
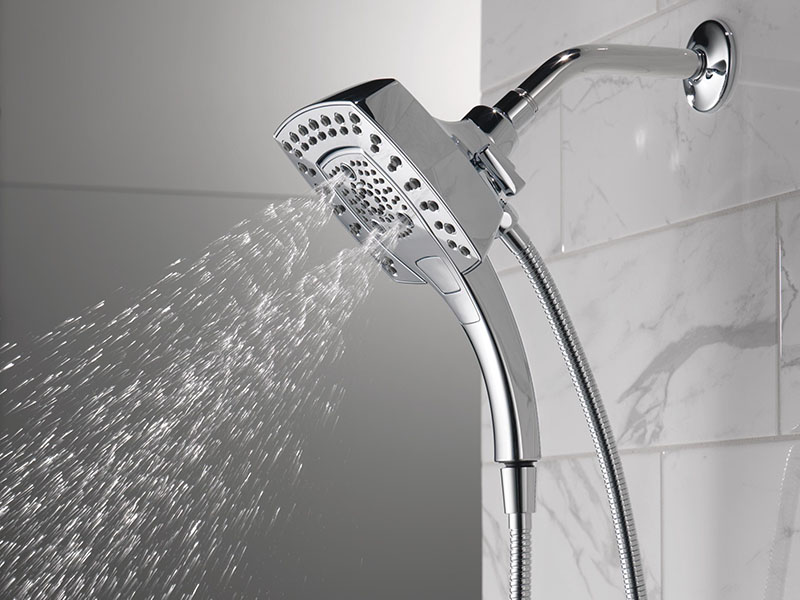
Two-in-One Showers with a Fixed Shower Head and Hand Shower
For many two-in-one showers, like the Delta® In2ition® and HydroRain® models, the shower head attaches directly to the shower arm. Some combination showers have a diverter instead. See the installation instructions for combo showers if your model has a diverter.
- Check to make sure there's a gasket and debris screen inside the shower head. The gasket helps ensure a tight seal, and the debris screen helps prevent larger particles from getting inside the shower devices and potentially damaging internal components.
- Hand-tighten the shower head onto the shower arm by turning the nut clockwise until the connection is snug. Be careful not to over-tighten. Avoid using tools (e.g., pliers or an adjustable wrench) that make it easy to twist too hard, potentially causing damage or leaks.
- Place the hose gaskets into the hose nuts on both ends of the hand shower hose.
- Connect one end of the hose to the hand shower and the other to the shower head. Hand-tighten the connections. Installation tip: Sometimes the hose will have two different types of connections. If one end has a hex nut (six sides), attach it to the shower head. Attach the tapered conical nut to the hand shower.
- Place the hand-held shower in the mount on the shower head.
Combo Showers with a Diverter, Fixed Shower Head and Hand Shower
- Check to make sure there's a gasket and debris screen inside the nut on the diverter/shower mount. The gasket helps ensure a tight seal, and the debris screen helps prevent larger particles from getting inside the shower devices and potentially damaging internal components.
- Hand-tighten the diverter/shower mount onto the shower arm by turning the nut clockwise until the connection is snug. Be careful not to over-tighten. Avoid using tools (e.g., pliers or an adjustable wrench) that make it easy to twist too hard, potentially causing damage or leaks.
- Hand-tighten the shower head onto the diverter/shower mount by turning the nut clockwise until the connection is snug.
- Place the hose gaskets into the hose nuts on both ends of the hand shower hose.
- Connect one end of the hose to the hand shower and the other to the diverter/shower mount. Hand-tighten the connections. Installation tip: Sometimes the hose will have two different types of connections. If one end has a hex nut (six sides), attach it to the shower arm mount. Attach the tapered conical nut to the hand shower.
- Place the hand-held shower in the mount.
Historias relacionadas.
-

Mejoras para el hogar 101
Cómo cambiar una llave de cocina
-

Mejoras para el hogar 101
Cómo cambiar una llave de dos manijas
-

Mejoras para el hogar 101
5 cosas inteligentes que hacer en la ducha