Saltar al contenido principal
img article how fix leaky shower head 1.jpgimg article how fix leaky shower head 1

Table of Contents

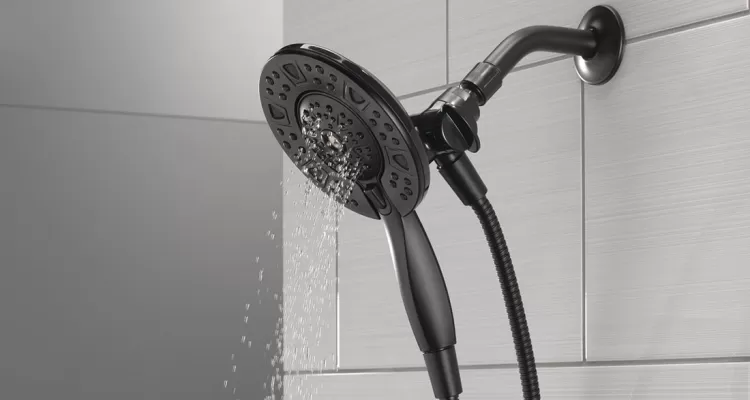
A little dripping after you turn off the shower head isn't a problem. But if your shower head keeps dripping long after you've turned it off or it drips from locations other than the spray holes while you shower, then you've got a leak. This guide will help you identify the source of the leak and get it fixed.

Why a Little Dripping is Okay

There's no need to be concerned if your shower head drips for a little while after you turn off the water. A shower head can hold a lot of water, and it's normal for it to drain a few drops, known as "run on," after a shower. It can take even longer to drain if the nozzles are clogged with mineral deposits, but that's easy to fix. Check out "How to Clean a Shower Head".

Identifying the Source of the Leak

When your shower leaks, help determine how to fix it. If the shower drips or leaks from the body of the shower head or the connection between the shower head and arm when the water is turned on, it's probably due to the shower head. But if it leaks from the shower head, handle, or tub spout when the water is turned off, then the valve cartridge is the most likely cause. Jump to the section below that's relevant to your situation.

Fixing a Leak that Occurs When the Water is On

Luckily, shower head leaks tend to be relatively simple to fix, and it's easy to replace a shower head, if needed. Before you begin, gather the tools you'll need, including:

  • Distilled white vinegar
  • Container that fits your shower head
  • Toothbrush (a used one is fine)
  • Soft cloth
  • Toalla
  • Cinta de teflón
  • Llave inglesa

The repair for a shower head leak differs based on where the leak is occurring. Check out the repair instructions below for your leak location.


Leaking Between the Shower Head and Shower Arm

There are several potential leak sources at the connection between the shower head and shower arm—a connection that's too loose, a compressed gasket caused by overtightening, or a clogged or missing debris screen. No matter the problem, the troubleshooting steps are the same:

  • Tighten the Shower Head: If the shower head feels loose, try tightening the nut until it's secure. Overtightening can cause damage or another leak, so be careful not to overdo it.  
  • Remove and Clean the Shower Head: If tightening the connection didn't fix the leak, remove the shower head and clean it thoroughly. Check out "How to Clean a Shower Head" for step-by-step instructions.
  • Clean the Debris Screen: A clogged debris screen is another potential culprit, so remove any debris while the shower head is being cleaned. The "How to Fix Low Water Pressure in Your Shower" blog includes more information about debris screens and how to clean them, if needed.
  • Replace Worn Gaskets: It's possible that the gasket that sits inside the nut has been crushed or deteriorated. This part is accessible and easy to replace when cleaning the device. For Delta® showers, all you need is a universal gasket (RP43621).
  • Replace the Plumber's Tape: When reinstalling the shower head be sure to remove and replace any tape. Keep in mind that you don't need a lot of tape. If it increases the diameter of the connection too much, it could cause the nut to break when it's screwed back on. For most Delta showers, plumber's tape is optional.
  • Reinstall Your Shower Head & Check for Leaks: For help, refer to our "How to Clean a Shower Head" blog. Turn on the water to check for any leaks as the final step.


Leaking from Shower Nozzles

Mineral deposits can build up in and around the spray nozzles, causing a haphazard spray or leak. Rub the spray holes to break up residue and use a soft cloth to wipe it away. For a deeper clean, follow the instructions in "How to Clean a Shower Head".


Leaking from Nozzles that Aren't Selected

Multi-function shower heads have a mode selector to toggle from one spray option to another. If the shower head is leaking from nozzles that shouldn't be "on" for the selected mode, then there may be a problem with the selector. Contact the manufacturer for assistance and to determine if the problem is covered by your warranty.


Leaking from a Seam in the Shower Head

A leak from a seam in the shower head face or body can't be repaired. Contact the manufacturer for assistance and to determine if the problem is covered by your warranty.

Fixing a Leak that Occurs When the Water is Off

When the water is turned off, the shower may leak from the shower head (shower only systems), handle, or tub spout. Since these leaks are most likely caused by the valve cartridge, fixing it requires disassembly of your shower handle/control to diagnose and correct the problem. You may want to contact a professional to help with the repair. 

If you feel comfortable making the repair yourself, gather the items below before you get started. Once disassembly is complete, you might discover that additional parts are needed.

  • Toalla
  • Phillips screwdriver
  • Hex key (also known as an Allen wrench)
  • Strap wrench
  • Valve cartridge and seats and springs for your model, if possible

The model for your tub/shower will indicate what type of valve cartridge is installed, which will dictate your repair options. If you don't know your model number, check with the manufacturer's customer solutions team for help, and to determine what components you'll need to replace. For Delta® products, see Who to Contact for Help.

Follow these steps to troubleshoot:

  1. Turn off the Hot/Cold Water Supply: You may need to turn off the water supply to the entire house or room. Or, if your shower has supply stops, you can turn off the water to the valve after the shower handle and face plate (also known as the escutcheon) are removed (see below).
  2. Turn on the Shower Control: This step drains any water left in the line to relieve pressure behind the valve cartridge.
  3. Remove the Shower Handle: Use the appropriate tool to remove the handle. Depending on the manufacturer, you might need a wrench, screwdriver, or another tool.

    DIY experts Mike & Hannah share this tip to make sure your repair goes smoothly:
    Cover the drain with a cloth or plug to catch any loose screws or other small items that could accidentally fall in. Also be sure to keep track of small parts when you uninstall your shower trim. Place them in a small bowl or container to avoid losing them.

    Placing a towel on the floor of the bathtub or shower also helps protect the surface in case a tool or part accidentally falls.
  4. Remove the Face Plate: Use the screwdriver to remove the screws. There may also be a trim sleeve that you need to slide off the valve.
  5. Remove the Bonnet: The bonnet (sometimes called a bonnet ring or bonnet nut) holds the valve cartridge in place. A strap wrench works best to remove the bonnet without damaging it. Be careful not to twist the valve behind the bonnet.
  6. Remove the Cartridge: Gently wiggle the cartridge out of position.
  7. Flush the System: Turn on the hot/cold water supplies and run the water to flush the system. Be sure to close the shower door or curtain first! The water may be very hot, so use caution. Turn off the water supplies after 30-60 seconds.
  8. Replace the Cartridge and/or Seats and Springs: Depending on your model, you may need to replace the entire cartridge or only the seats and springs. Contact the manufacturer for your shower to find out what's appropriate for your model.
  9. Reassemble the Shower Valve: Follow the manufacturer's instructions to reassemble the shower valve. If your shower valve has supply stops, don't forget to turn them on before replacing the shower handle and face plate/escutcheon.
  10. Check for Leaks: Turn on the hot/cold water supplies. Run the shower to check for any leaks and check again when the water is turned off.

Signs There's a Leak Behind the Shower Wall

Leaking behind the wall of your shower can cause extensive damage if it goes unchecked. Be sure to explore the water source and get it fixed if you notice any of these signs:

  • A dripping sound behind the wall
  • Water on the floor in an adjacent room
  • Water stains on the ceiling below the shower

Who to Contact for Help

Visit our Pro Directory if you need help finding a professional plumbing contractor in your area.

Our award-winning customer solutions team is always ready to assist if you need it. Call us at 800-345-DELTA (3358) or click the "Chat with an Expert" box on our Contact Us page to connect with our team.

Whenever you're ready to replace your shower head, you can find Delta models in a variety of styles and finishes. Use our search function if you'd like a specific finish or functionality.